Add a domain to handles.net
Adding a domain to handles.net is a simple 2 step process: add the domain via the dashboard, then configure the domain’s DNS.
1. New Domain
Section titled “1. New Domain”Visit your handles.net dashboard and click “New Domain” in the sidebar to navigate to the “New Domain” form. The “New Domain” form accepts the domain name that you wish to issue handles under. The domain name can be a top-level domain (e.g: example.com) or a subdomain (e.g: at.example.com).
2. Configure Domain
Section titled “2. Configure Domain”After completing the “New Domain” form you will be redirected to the “Configuration” page for your domain. The “Configuration” page contains “DNS Settings” and “Policy” configuration options.
DNS Settings
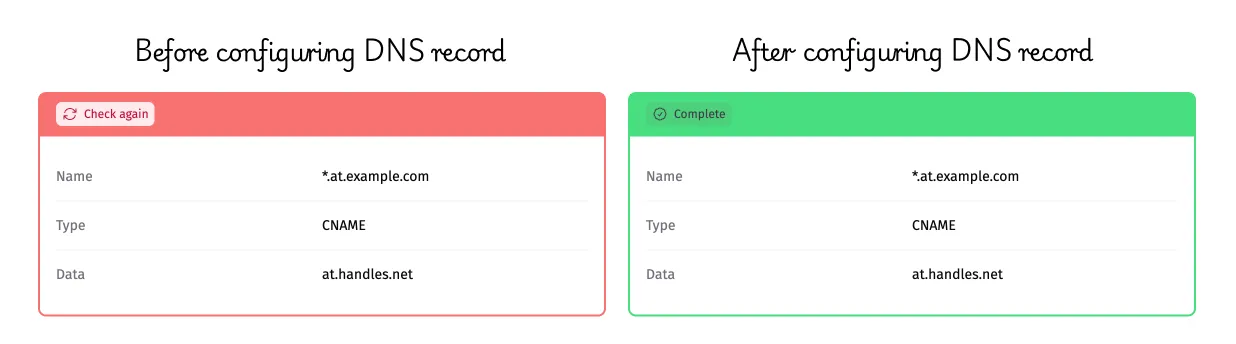
Section titled “DNS Settings”A wildcard DNS record is required to point your domain to the handles.net handles server which is available as at.handles.net. Create a new record with the name * of type CNAME with data of at.handles.net. The configuration page will continuously check your domain’s records and turn green once the record is detected — this may take a few minutes after you make the change, as DNS records can take time to propagate.
Provider specific instructions are available in the following articles:
Provider not listed, or need any help configuring your DNS records? Get in touch, we’re happy to help.
Domain Policy
Section titled “Domain Policy”Every domain starts out with a “closed” policy which prevents any third-party handle registration — only you can create handles. Choose a new policy by clicking on the policy and then click “Change Policy”.